I just finished getting my 20-year-old son ready for his junior year semester study abroad program in Osaka, Japan. There is usually a LOT of prep needed to start any new school year, but adding in international travel and a four-month stay in a very far-off land adds in a whole new level of complications and planning.
In order to improve his Japanese as well as to immerse himself more fully in the culture, my son will be studying at a Japanese university and living with a host Japanese family. In case there are others out there who are planning a similar trip, I thought it would be helpful to outline some of the steps we needed to take to get him ready for this once in a lifetime experience.
• STEP 1: Get a student visa
While not all countries require a visa, Japan is one that does, and we needed to make sure this was done well in advance of his travel. Fortunately, the Japanese Embassy is a short drive from our home and we were able to drop off the paperwork in person and get the visa two days later.
• STEP 2: Book a flight
We opted to go for ANA, which has non-stop flights to Tokyo from the DC area, and we purchased the tickets 2 months before his flight. We also decided to splurge a bit and pay a few hundred dollars more for Premium Economy, which for a 15-hour flight is well worth it! Premium Economy also allows you to check two pieces of luggage, rather than just one, which is crucial if you are packing 4 months’ worth of clothing and personal items.
• STEP 3: Get permission to bring medicine into the country
Japan is very strict about allowing any medication at all into the country, even if it is over the counter. Stimulants of any kind, such as Actifed, Sudafed, or Ritalin and any of its derivatives, are completely prohibited, even with a doctor’s prescription.
In order to bring more than one month’s worth of any kind of medicine or medical device into Japan, you need to apply for a Yakkan Shomei, a kind of import certificate. It’s a lot of paperwork, and you need a written prescription from your doctor if you are bringing in prescription meds. We didn’t realize how much work was involved, and didn’t get around to applying for this until less than a week before my son’s flight. To our surprise and delight, the certificate was emailed to us two days later. The Japanese might be strict, but they are extremely efficient!
• STEP 4: Get a phone plan
We wanted to make sure that our son could stay in contact with us. While there are some great apps for calling and texting via wi-fi (Whatsapp and Viber), we decided to purchase a monthly international calling plan through Verizon (our regular carrier) for $40 a month. Once he is in Japan, he can look into buying or renting a data-only SIM card, which he can use in his iPhone 6, since the Verizon plan we bought only allows for a meager 100 MB of data.
• STEP 5: Bring gifts for your host family
The Japanese are big gift givers, and since my son will be living with a family, it is customary to bring some small items of thanks, usually from your home town – or something else that is not easily purchased in Japan. This was a bit tricky, since we have no idea whom he will be living with (they don’t tell the students who their host family is until they get to Japan, during orientation week). After much debate, we settled on some t-shirts from Rockport, MA (where our family has spent summers every year since our kids were born) and Washington DC where we live the rest of the year, and a box of Jelly Bellies.

• STEP 6: Pack wisely
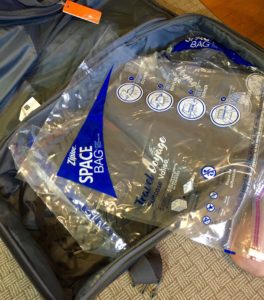
My son had to pack everything he might need for the next four months, including school supplies and personal items, into just two suitcases. We ended up using these great Travel Space Bags by Ziplock, which compress the air out of your clothing and effectively double the amount of stuff you can take.

He packed a good supply of personal items like body wash, shampoo, toothpaste, razors, shaving cream, deodorant, etc., since we weren’t sure he could find in Japan what he normally uses here in the U.S. And he was careful to remember to pack him a laundry bag as well!

• STEP 7: Use Dropbox to share important documents
We made copies of our son’s passport (after making sure that it won’t expire in the next year), scanned them, and saved them into a Dropbox folder that we share with him. We also put into the folder any other files that he might need, including all of his application materials, the Yakkan Shomei (for his medication), and certificates of insurance coverage that he needs to show to the program administrators.
It was a lot of work and a bit stressful at times, but he got on his flight this afternoon and is winging his way to Japan as I write this. I will know soon if all our preparations worked out the way we hoped!


