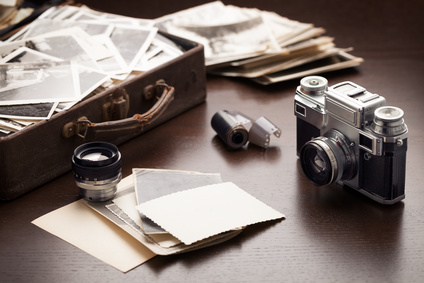
This month, I’m very pleased to have Rachel Jenkins, Founder of ScrapMyPix, be my guest blogger on a topic I get asked about a lot – organizing your printed photos! Rachel is my go-to gal when it comes to photo organizing, and I thought she would be the perfect person to give my readers some advice on getting started on this monumental task.
The hardest part of organizing your printed photos is getting started. It’s one of those nagging tasks that most avoid until they end up wasting hours searching for that one photo for an event or for a school project. And if that’s the precipice that motivates you to organize those plastic bins, let’s make sure you’re investing your time wisely.
I’m going to give you a few tips to help you get started. First off have a large enough work space to lay it all out. I suggest a dining table or large folding table, and don’t worry – you don’t have to leave it all out till the project is completed. Although for some that might be a motivator.
Collect your supplies….you’ll need a few to make your task a little easier. A pad of sticky notes, maybe some 4×6 index cards, a photo-safe pencil, an archival box to store your organized photos, photo-handling gloves if you want to avoid fingerprints, and a garbage and/or recycle bin. Check your local recycling requirements. In some counties photos are recyclable, and in some they are not.
Relocate all your boxes, envelopes and drawers of photos, framed photos and albums to your work area. If you’re not planning on taking apart old albums to include in this project, you can leave them where they are. The albums I would consider disassembling are the old magnetic ones. Those are the old albums with the sticky pages. They are not archival products and could be damaging your photos.
The next step that goes a long way is a little planning. Think about what you want the end to look like and develop a plan to guide you toward that goal. Do you want to create albums or a photo wall? Or are you looking to digitize your printed photos so you have a backup or a slide show perhaps?
With the end game in mind, you can now create your categories. Will they be chronological or theme-based? This is a personal decision. Chronological order can take longer if you’ve got decades of photos, but if that’s how you recall, it might be your preference. One of the simplest methods is to organize by theme. Again, it’s about how you recall your memories. Theme-based organizing makes it super easy to find a picture of Aunt Jean later. Make your list of the themes that make sense for your family. For instance, one for each of the members of your immediate family, a vacation you take each year, or a holiday you know you’ll have pictures from each year.
Once you’ve got your themes, write each category on a sticky note (sticky surface at the bottom) and spread them out across your workspace. This is where you will start placing your sorted photos. These will also serve as your temporary tab dividers when you’re done sorting for the day. As you process each handful of photos, consider whether it’s a photo worth keeping. It’s okay to throw out photos that are overexposed, underexposed, blurry, duplicates, have people that you can’t identify, or are redundant photos of landscapes from vacations. It’s also okay to add additional themes, remove themes, and combine themes as you work. Organizing your photos is an evolving process.
As you’re sorting, you may want to include identifying information on your photos from the envelopes from which they were removed. Don’t rely on your memory for dates and places, and even people. Use your photo-safe pencil and not ink.
Once you’re done with each session, make another set of sticky notes with your categories for next time. This allows you to file your initial set of photos into your archival box and have a set of stickies to lay out at the start of your next session. Use that first set of stickies as your tabs to divide your photo categories.
A few additional tips I’ve gathered over the years is that everyone has a threshold for productivity and attention. You know your own limits, so set a timer and don’t overdo it. Otherwise you may not be motivated to go back and finish. Ask for help. Family members are a useful and free resource! Just be careful you don’t get caught reminiscing over every photo as it will really hinder your progress. There will be time for that once they’re organized. If you prefer professional assistance to get organized, feel free to contact me to discuss your project and determine if you’d like my help.
 Rachel Jenkins is the founder of ScrapMyPix, LLC, serving MD/DC/VA and virtual clients. She provides photo organizing services specializing in preserving both printed and digital photographic materials.She is a Certified Member of the Association of Personal Photo Organizers. You can contact her at rachel@scrapmypix.com or 443-226-9801.


1 thought on “A plan for organizing your printed photos”
Thank you so much for the great tips. As a Professional Organizer I refer photographs out to other organizers as it’s quite a specialty. It seems like more and more people are open to scanning their photos, and I think that’s a good thing. I refer those out too!